Friday, January 31, 2025

Easy 2x4 Furniture Plans for Practical and Affordable Builds

Hey there, fellow DIY enthusiasts! Let's talk about building furniture. Specifically, let's talk about building awesome, practical, and affordable furniture using the humble 2x4. Forget fancy hardwoods and complicated joinery – we're going for straightforward projects that even a beginner can tackle. Think sturdy, functional pieces that look great and won't break the bank. Ready to get your hands dirty?

Why Choose 2x4s?

Before we dive into the plans, let's chat about why 2x4s are the unsung heroes of DIY furniture. They're readily available at any home improvement store, incredibly affordable, and surprisingly versatile. Plus, they're strong enough for most furniture projects, making them perfect for beginners. No need to worry about complicated cuts or specialized tools – basic carpentry skills are all you'll need.

Advantages of Using 2x4s:

  • Affordability: 2x4s are one of the cheapest lumber options out there.
  • Availability: You can find them at almost any hardware store.
  • Strength: They're surprisingly strong for their size, suitable for many furniture pieces.
  • Ease of Use: They're easy to cut and work with, even for beginners.

Simple 2x4 Furniture Projects:

Now for the fun part! Let's explore some easy-to-build 2x4 furniture projects. These plans are simplified, focusing on the core structure and functionality. Remember to always prioritize safety and use appropriate safety gear like safety glasses and work gloves.

1. The Classic 2x4 Bench

Materials:

  • Six 2x4s (8 feet long)
  • Wood screws (2.5-inch)
  • Wood glue
  • Sandpaper
  • Optional: Wood stain or paint

Instructions:

  1. Cut two 2x4s to your desired bench length. These will be the seat supports.
  2. Cut four 2x4s to the desired bench height. These will be the legs.
  3. Attach the legs to the seat supports using wood glue and screws, creating a sturdy rectangular frame.
  4. Cut several 2x4s to the desired seat width and attach them to the frame, creating the seat surface. Ensure they are evenly spaced for a comfortable seat.
  5. Sand down any rough edges and apply stain or paint, if desired.

This basic bench is incredibly versatile. You can adjust the dimensions to fit your space and needs. Want a longer bench? Just use longer 2x4s! Want a taller bench? Simply adjust the leg height.

2. A Sturdy 2x4 Coffee Table

Materials:

  • Eight 2x4s (8 feet long)
  • Plywood (for the tabletop – size depends on your desired table dimensions)
  • Wood screws (2.5-inch and 1.5-inch)
  • Wood glue
  • Sandpaper
  • Optional: Wood stain or paint

Instructions:

  1. Build a simple rectangular frame using four 2x4s for the base. Remember to use wood glue and screws for extra strength.
  2. Cut four more 2x4s to act as supports for the tabletop. Attach these to the inside corners of the base frame.
  3. Cut your plywood to the desired tabletop size and attach it to the supports using screws. Consider using shorter screws here to avoid going through the top of the plywood.
  4. Sand and finish with stain or paint.

This coffee table offers a modern, minimalist look. You can easily customize the size and add features like wheels for mobility.

3. A Simple 2x4 Bookshelf

Materials:

  • Six 2x4s (8 feet long)
  • Plywood or MDF for shelves (size depends on your desired shelf dimensions)
  • Wood screws (1.5-inch and 2.5-inch)
  • Wood glue
  • Sandpaper
  • Optional: Wood stain or paint

Instructions:

  1. Build two vertical side supports using three 2x4s each, screwing them together to create a sturdy structure.
  2. Cut your plywood or MDF for the shelves and attach them to the vertical supports using screws and wood glue. Space them evenly according to your preference.
  3. Sand and finish with stain or paint.

This bookshelf is a great starting point for beginners. It's easy to adjust the number and height of shelves to meet your storage needs.

Tips for Success:

  • Measure twice, cut once: This is crucial in any woodworking project. Accuracy is key for a clean, professional finish.
  • Use wood glue: Glue significantly strengthens your joints, making your furniture more durable.
  • Pre-drill holes: Pre-drilling prevents the wood from splitting when you drive in screws.
  • Sand everything: Sanding smooths out any rough edges and creates a more professional look.
  • Finish it off: A coat of stain or paint protects the wood and adds a nice touch.

Commonly Asked Questions (FAQs)

Now, let's address some frequently asked questions about building 2x4 furniture.

Q: What kind of screws should I use?

For most 2x4 projects, 2.5-inch wood screws are a good all-around choice. However, you may need shorter screws for attaching thin materials like plywood.

Q: Do I need special tools?

The basic tools you'll need are a saw (circular saw or hand saw), a drill, a screwdriver, a measuring tape, and sandpaper. Clamps can also be very helpful.

Q: How can I make my 2x4 furniture more aesthetically pleasing?

There are several ways to enhance the look of your 2x4 furniture. You can apply a stain or paint, add decorative elements like trim, or even incorporate different types of wood for contrast.

Q: How durable is 2x4 furniture?

While 2x4 furniture isn't as durable as furniture made from hardwoods, it's surprisingly sturdy for everyday use, especially if you use proper joinery techniques and plenty of wood glue.

Q: Can I build more complex furniture with 2x4s?

Absolutely! While these plans focus on simple designs, you can absolutely adapt the techniques and principles to build more elaborate pieces. With practice and creativity, you can build almost anything!

So there you have it! A starting point for your 2x4 furniture journey. Remember to have fun, be patient, and don't be afraid to experiment. Happy building!

Safe and Stylish Baby Furniture Plans for Your Newborn's Room

The arrival of a newborn is a joyous occasion, prompting a flurry of preparations, none more significant than creating a safe and nurturing environment. A baby's room should be a haven of comfort and security, and the furniture plays a pivotal role in achieving this. This comprehensive guide explores the crucial aspects of selecting and designing baby furniture, emphasizing both safety and style. We will delve into various furniture pieces, offering detailed considerations and practical advice to assist expectant parents in creating a perfect nursery.

The Crib: The Cornerstone of the Nursery

The crib is undoubtedly the most important piece of furniture in a newborn's room. Safety must be the paramount concern when selecting a crib. Compliance with stringent safety standards is non-negotiable. Look for cribs that adhere to the latest guidelines set by organizations such as the American Academy of Pediatrics (AAP) and the Consumer Product Safety Commission (CPSC).

Choosing a Safe Crib

Spacing: Ensure the crib slats are appropriately spaced—no more than 2 3/8 inches apart—to prevent a baby from getting their head or body trapped. Mattress Firmness: The mattress should fit snugly within the crib frame, leaving minimal gaps. A firm mattress is crucial to reduce the risk of Sudden Infant Death Syndrome (SIDS). Materials: Opt for cribs constructed from non-toxic materials, free from lead and other harmful chemicals. Hardware: All hardware should be securely fastened, with no sharp edges or protruding parts that could pose a hazard.

Stylish Crib Designs

Safety doesn't have to compromise style. Modern crib designs offer a diverse range of aesthetic choices. Consider the overall theme of the nursery when selecting a crib. Classic designs often feature simple lines and natural wood finishes, creating a timeless appeal. Modern cribs may incorporate sleek lines, minimalist aesthetics, and unconventional materials. Cottage-style cribs often feature intricate carvings and ornate details, adding a touch of rustic charm.

Beyond the traditional crib, consider alternative options such as convertible cribs which can be transformed into toddler beds or even full-size beds, providing longevity and cost-effectiveness. Mini cribs are ideal for smaller spaces, while portable cribs offer versatility for travel or multiple rooms within the home.

Changing Tables: Convenience and Safety

Changing tables provide a dedicated and convenient space for diaper changes, reducing the risk of accidents on less stable surfaces. However, safety should be prioritized above all else.

Safety Precautions for Changing Tables

Stable Base: The changing table should be sturdy and have a wide, stable base to prevent tipping. Safety Straps: Use a safety strap to secure the baby during diaper changes, mitigating the risk of falls. Stable Changing Surface: Ensure the changing surface is appropriately sized and level. Edge Protection: Check for rounded edges and corners to prevent injuries.

Stylish Changing Table Options

Changing tables are available in a variety of styles to complement different nursery aesthetics. Freestanding changing tables offer independence, while dresser-top changing units combine storage with a changing surface, saving space. Many modern designs integrate clean lines, minimalist styles, and contemporary materials.

Consider the inclusion of drawers or shelves for storing diapers, wipes, and other baby essentials. Opt for designs with smooth surfaces for easy cleaning and maintenance.

Dressers and Storage: Organization and Accessibility

Ample storage is crucial in a baby's room. Dressers provide essential space for storing clothes, linens, and other baby items. Safety and functionality are key considerations.

Safe Dresser Selection

Anchoring: Secure the dresser to the wall to prevent tipping accidents. Drawer Safety: Choose drawers that open and close smoothly, without pinching hazards. Stable Construction: Ensure the dresser is sturdy and well-constructed to withstand the weight of stored items.

Stylish Storage Solutions

Dressers come in diverse styles and designs to match any nursery theme. Traditional dressers provide classic elegance, while modern designs may incorporate sleek lines and unique hardware. Built-in shelving and wall-mounted storage can maximize space and organization. Wicker baskets and fabric bins can add texture and softness, while simultaneously storing various items.

Rocking Chairs and Gliders: Comfort and Soothe

A rocking chair or glider offers a comfortable and calming space for parents to bond with their newborn. Choosing a comfortable and safe option will enhance the overall nursery experience.

Comfort and Ergonomics

Consider the chair's comfort and ergonomics. Look for well-padded seats and backs for prolonged sitting. The rocking mechanism should be smooth and quiet.

Stylish Options

Rocking chairs and gliders are available in a range of styles, from traditional designs to modern interpretations. Consider the overall aesthetic of the nursery when making your choice. Upholstery options can be tailored to suit various tastes and match the chosen nursery theme.

Choosing Non-Toxic Materials and Finishes

Prioritizing non-toxic materials is essential when furnishing a baby's room. Look for furniture made from sustainable and environmentally friendly materials, free from harmful chemicals such as lead and formaldehyde. Opt for water-based paints and finishes instead of those containing volatile organic compounds (VOCs).

Conclusion

Creating a safe and stylish nursery is a rewarding process. By carefully considering the safety features of each furniture piece, along with the overall aesthetic, parents can design a space that is both beautiful and nurturing. Remember that safety should never be compromised, and by adhering to safety guidelines and choosing high-quality, non-toxic materials, parents can ensure their newborn has a secure and comfortable environment to thrive in.

Unleash Your Inner Carpenter: Custom DIY Woodworking Projects

Transforming Your Home with Woodworking Magic

The scent of freshly cut wood, the satisfying whir of a saw, the pride in crafting something beautiful and functional with your own two hands – DIY woodworking offers a unique blend of creativity and accomplishment. Forget mass-produced furniture; let's explore how you can infuse your home with personality and warmth using customized woodworking projects. This isn't about complex joinery techniques (although those are exciting too!), but rather focusing on achievable projects that yield impressive results. Whether you're a seasoned woodworker or a complete beginner, we'll provide inspiration and guidance to help you embark on your woodworking journey. Imagine the satisfaction of creating a unique piece, perfectly tailored to your space and style, from a simple design to a more intricate masterpiece.

Crafting a Rustic Coffee Table

Start with a foundational project that balances practicality and visual appeal: a rustic coffee table. Select reclaimed wood planks for an authentic, aged look, or opt for fresh pine for a brighter, cleaner aesthetic. Measure your desired dimensions carefully, then cut and sand the planks to achieve a smooth surface. Simple butt joints, secured with wood glue and screws, create a sturdy tabletop. For the legs, repurpose sturdy tree branches, industrial pipe fittings, or even purchase pre-made legs from a home improvement store. Stain the wood to complement your existing décor, applying several thin coats for even coverage. Once dry, add a protective sealant to prolong the table's life and enhance its beauty. The final touch? Consider adding a shelf underneath for storage – a simple addition that boosts functionality.

Building a Charming Floating Shelf

Floating shelves provide an elegant solution for showcasing cherished items and adding visual interest to any room. These projects are surprisingly straightforward. You'll need sturdy wooden boards, carefully measured and cut to your desired length and depth. Hidden brackets, attached to both the wall and the back of the shelf, are the key to achieving the "floating" effect. Ensure you select brackets that can support the weight of your intended items. Before mounting, pre-drill pilot holes to prevent wood splitting. A simple coat of paint or stain adds a personalized touch, harmonizing with your existing color palette. Experiment with different shapes and sizes to create a unique display system that maximizes your wall space.

Embracing the Outdoors with Wooden Creations

Extend your woodworking skills beyond the confines of your home and create stunning outdoor features. The possibilities are endless, from practical structures to decorative accents that will enhance your garden or patio.

Constructing a Birdhouse

A birdhouse is a rewarding project, both for its simplicity and the pleasure of attracting feathered friends to your backyard. Choose cedar or redwood for its weather resistance. Follow a readily available plan or design your own, ensuring sufficient ventilation and drainage. Precise cuts and careful assembly are crucial to create a sturdy and safe home for your avian guests. Sand all surfaces thoroughly to prevent splinters, and consider adding a protective exterior sealant. Don't forget the entrance hole – the size will depend on the type of bird you wish to attract. Mounting the birdhouse securely on a sturdy post or tree branch completes this charming, environmentally conscious project.

Building a Raised Garden Bed

Elevated garden beds offer numerous advantages: improved drainage, easier access for planting and weeding, and a defined space to cultivate your favorite herbs, flowers, or vegetables. Use untreated lumber, such as cedar or redwood, to avoid potential chemical leaching into your soil. Construct a simple box-like frame, using screws and wood glue for a strong and lasting structure. Ensure the frame is level and square. Line the inside of the bed with landscape fabric to prevent weed growth and soil erosion. Fill with high-quality soil and get ready to enjoy the fruits (and vegetables!) of your labor.

Remember to always prioritize safety when working with woodworking tools. Wear appropriate safety gear and follow instructions carefully.

Build Your Own Exquisite Wooden Chest: A Comprehensive Guide

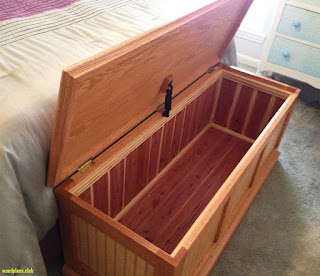
Crafting a beautiful, sturdy wooden chest is a rewarding woodworking project, perfect for beginners and seasoned artisans alike. This detailed guide provides step-by-step instructions, ensuring you create a piece you'll cherish for years to come. Whether you envision a rustic treasure chest or a sleek, modern design, this plan offers the flexibility to adapt to your personal style. Prepare to unleash your creativity and build something truly special!

Materials You'll Need

Before you begin, gather your materials. Accuracy here is crucial for a well-fitting chest. Measure twice, cut once! You'll need:

  • Wood: Choose your preferred wood type. Hardwoods like oak, walnut, or cherry offer durability and a rich finish, while softer woods like pine are easier to work with for beginners. Calculate the amount needed based on your desired chest dimensions (see detailed dimensions below).
  • Wood Glue: A high-quality wood glue is essential for strong joints.
  • Wood Screws: Choose screws appropriate for your chosen wood type and thickness.
  • Clamps: Several clamps of varying sizes will help secure joints while the glue dries.
  • Sandpaper: Assorted grits (e.g., 80, 120, 220) for smoothing surfaces.
  • Wood Finish: Select a finish that complements your wood and desired aesthetic (e.g., varnish, polyurethane, stain).
  • Hinges: Choose sturdy hinges appropriate for the size and weight of your chest.
  • Latch or Lock (optional): Add a secure latch or lock for extra security.
  • Measuring Tape, Pencil, Saw, Chisel, Drill, Screwdriver: Basic woodworking tools.

Detailed Chest Construction

Cutting the Wood

Begin by accurately cutting your chosen wood according to the dimensions below. Remember to account for the thickness of your wood when calculating the final measurements. Precise cuts are paramount for a snug fit. Use a miter saw for clean, accurate cuts, ensuring your cuts are square and free from splintering. For intricate cuts or curves, a jigsaw may be needed. Always wear appropriate safety gear, including eye protection and a dust mask.

Assembling the Chest Sides and Bottom

Apply wood glue to the edges of the side pieces and the bottom piece. Carefully align the pieces and clamp them firmly together, ensuring that all corners are perfectly square. Allow the glue to dry completely according to the manufacturer's instructions. Once dry, reinforce the joints with wood screws, countersinking them slightly for a flush surface.

Attaching the Top and Lid

Repeat the glue and screw method to attach the top piece to the assembled box. For the lid, ensure that it fits snugly but allows for easy opening and closing. Consider adding small blocks on the inside of the top edge of the chest to allow for the lid to sit on these and prevent it from sagging over time. Again, use clamps to hold everything in place until the glue is fully set.

Installing Hinges and Hardware

Once the glue is completely dry, carefully install the hinges on the lid and the chest's top edge. Ensure they are evenly spaced and aligned. After attaching the hinges, install your chosen latch or lock. Follow the manufacturer's instructions carefully for correct installation.

Finishing Touches

Sand all surfaces thoroughly, starting with a coarser grit sandpaper and gradually moving to finer grits, to achieve a smooth finish. Clean the chest thoroughly before applying your chosen wood finish. Apply the finish in thin, even coats, allowing each coat to dry completely before applying the next. Multiple coats will enhance the protection and beauty of your chest.

Dimensions (Example - Customize to your needs!)

These are example dimensions; feel free to adjust them based on your preferences:

  • Length: 24 inches
  • Width: 16 inches
  • Height: 12 inches
  • Wood Thickness: ¾ inch

Congratulations! You've now successfully built your own exquisite wooden chest. Enjoy the satisfaction of crafting a beautiful and functional piece with your own two hands. Remember to always prioritize safety and take your time to ensure accuracy at every stage of the process.

Rustic Coffee Table DIY: Comprehensive Plans and Instructions

This document provides a detailed guide for constructing a rustic coffee table, emphasizing practicality and aesthetic appeal. The design prioritizes readily available materials and straightforward techniques, making it achievable for individuals with varying levels of woodworking experience. The project employs reclaimed or readily sourced lumber for an authentic rustic charm.

Phase 1: Material Selection and Preparation

The success of any DIY project hinges on careful material selection and preparation. This phase focuses on choosing appropriate lumber and preparing it for assembly.

Choosing Your Lumber

For a genuine rustic aesthetic, reclaimed wood is ideal. Sources include salvaged barns, demolition sites, or even reclaimed lumber yards. Alternatively, readily available lumber from home improvement stores can be used. Consider using pine, fir, or cedar for their affordability and workability. Aim for lumber with a thickness of at least 1.5 inches for the tabletop and 1 inch for the legs and supports. The dimensions will, of course, be adjusted according to your desired coffee table size. Inspect all lumber carefully for knots, cracks, and warping. These imperfections actually enhance the rustic look, but significant structural flaws should be avoided. If using new lumber, consider distressing it to achieve a more aged appearance (techniques detailed below).

Preparing the Lumber

Before beginning assembly, the lumber requires meticulous preparation. This crucial step ensures the final product is structurally sound and aesthetically pleasing.

  • Cleaning: Remove any dirt, debris, or loose bark from the lumber. A wire brush is effective for removing stubborn debris from reclaimed wood.
  • Planing (Optional): If your lumber has a rough surface, planing will create a smoother, more consistent surface. However, for a truly rustic look, leaving some texture might be preferable.
  • Cutting: Accurately cut the lumber to the specified dimensions detailed in the assembly instructions (provided below). A miter saw provides the greatest precision, but a hand saw can suffice for less demanding cuts. Always wear appropriate safety equipment, including eye protection and hearing protection.
  • Sanding: After cutting, sand all surfaces to remove any splinters or rough edges. Begin with coarser grit sandpaper (80-100 grit) and gradually move to finer grits (120-220 grit) for a smooth finish. Pay close attention to corners and edges.
  • Distressing (Optional): If using new lumber, creating a distressed finish enhances the rustic appearance. Techniques include using a chain, hammer, or chisel to create dents and scratches. Also, consider using a wire brush to further texture the wood. Apply a stain or paint for color variation and an aged look.

Phase 2: Assembly

This phase outlines the steps for assembling the coffee table. Accuracy and precision are crucial for a structurally sound and visually appealing final product.

Constructing the Tabletop

For a simple rectangular tabletop, join the chosen lumber boards edge-to-edge using wood glue and screws. Pre-drill pilot holes to prevent the wood from splitting. Use wood clamps to ensure tight and even pressure while the glue dries. For a more complex design, multiple smaller boards can be arranged in a pattern, creating a unique visual interest.

Building the Legs and Supports

The legs can be constructed from four individual pieces of lumber, or from pre-made, commercially available legs for added convenience. If constructing your legs from scratch, cut them to your desired height and attach them to the tabletop using sturdy brackets or corner braces. Consider adding cross-supports for extra stability, especially for larger tabletops. These supports can be attached beneath the tabletop, connecting the legs and reinforcing the structure.

Finishing Touches

Before attaching the legs, ensure the tabletop is level and the leg supports are securely attached. Once the legs are attached, carefully check for stability and levelness. Any adjustments should be made before proceeding to the next step.

Phase 3: Finishing and Refinement

The final phase focuses on enhancing the aesthetic appeal and durability of the coffee table.

Sanding and Smoothing

After assembly, sand the entire coffee table again, focusing on any rough areas or imperfections. Start with coarser grit sandpaper and gradually move to finer grits for a smooth finish. Pay special attention to any seams or joints.

Applying a Finish

Numerous finishing options exist, each offering a unique aesthetic. Consider the following:

  • Polyurethane: Provides a durable and protective finish, resisting scratches and water damage. It comes in various sheens, from gloss to matte.
  • Tung oil: A natural oil finish that enhances the wood's natural beauty, offering a subtle sheen. It requires multiple applications for adequate protection.
  • Wax: Provides a low-luster finish that enhances the wood's natural color and texture. It's easy to apply but offers less protection than polyurethane or tung oil.

Apply the chosen finish according to the manufacturer's instructions. Multiple coats may be necessary for optimal protection and aesthetic appeal. Allow ample drying time between coats.

Adding Personal Touches

Consider adding personal touches to enhance the coffee table's unique character. This could include:

  • Metal accents: Adding metal brackets, handles, or decorative elements can complement the rustic aesthetic.
  • Inlays: Incorporate contrasting wood pieces or other materials into the tabletop for added visual interest.
  • Customizable Feet: Replace simple feet with decorative castors or bun feet for a unique look.

With careful planning and execution, constructing a rustic coffee table offers a rewarding DIY experience. The finished product provides a functional and aesthetically pleasing addition to any home, reflecting the creator's unique style and craftsmanship.

Constructing a Rustic Farmhouse Coffee Table: A Comprehensive Guide

This detailed guide provides a comprehensive, step-by-step approach to building a sturdy and aesthetically pleasing coffee table, suitable for both novice and experienced DIY enthusiasts. The design emphasizes a rustic farmhouse aesthetic, achievable with readily available materials and tools. This project prioritizes clarity and precision, ensuring a successful outcome even for those new to woodworking.

I. Planning and Material Acquisition

Before commencing construction, meticulous planning is crucial for a smooth and efficient process. This involves determining the desired dimensions, selecting appropriate materials, and acquiring the necessary tools. A well-defined plan minimizes errors and maximizes resource utilization.

A. Determining Dimensions and Design

The first step is to establish the desired dimensions of your coffee table. Consider the available space in your living room and the overall aesthetic you wish to achieve. A standard coffee table height typically ranges from 16 to 18 inches. The length and width are more flexible and dependent on personal preference and available space. Sketch a simple design to visualize the final product, noting all critical dimensions. Consider including details like the thickness of the tabletop and the height of the legs.

B. Material Selection

Selecting high-quality materials is essential for both durability and aesthetic appeal. For this project, we recommend utilizing reclaimed wood for a rustic farmhouse look. Reclaimed wood offers unique character and contributes to a sustainable approach. Alternatively, pressure-treated lumber provides excellent durability and weather resistance if you intend to place the coffee table outdoors. Consider the following materials:

  • Tabletop: Reclaimed wood planks (e.g., pine, oak, or barn wood) approximately 1.5 to 2 inches thick. The total width of the planks should equal the desired width of your coffee table. Consider using multiple planks for a more rustic appearance. Ensure planks are relatively straight and free from significant cracks or warping.
  • Legs: 4x4 lumber (pressure-treated or reclaimed) cut to the desired height. Consider using thicker legs for added stability, especially for larger tabletops.
  • Apron (Optional): 2x4 lumber to create a frame around the perimeter of the tabletop, adding support and enhancing the aesthetic appeal. This is especially recommended for larger tabletops.
  • Wood Screws: Exterior-grade wood screws of appropriate length and gauge for secure fastening.
  • Wood Glue: A high-quality wood glue for added strength and stability in joints.
  • Wood Filler: For filling any gaps or imperfections in the wood.
  • Sandpaper: Various grits (e.g., 80, 120, 220) for smoothing surfaces and removing imperfections.
  • Wood Stain or Paint (Optional): To enhance the color and protect the wood. Choose a stain or paint that complements your existing décor.
  • Polyurethane (Optional): A clear coat of polyurethane sealant provides protection against moisture and scratches.

II. Construction Process

This section details the step-by-step construction process, emphasizing precision and safety. Always wear appropriate safety equipment, including safety glasses and gloves.

A. Preparing the Tabletop

Begin by carefully cleaning the reclaimed wood planks. Remove any loose debris, dirt, or nails. If using multiple planks, arrange them in the desired pattern, ensuring a smooth and even surface. Use wood glue to bond the planks together and clamp them firmly until the glue dries completely. Once dry, use a planer or hand-plane to level the surface, creating a uniform thickness. Sand the tabletop thoroughly using various grits of sandpaper, starting with coarser grits and finishing with finer grits to achieve a smooth finish.

B. Constructing the Apron (Optional)

If using an apron, cut four pieces of 2x4 lumber to the appropriate lengths to form a rectangle around the perimeter of the tabletop. Use wood glue and screws to securely attach the apron to the underside of the tabletop, ensuring it is square and level. Sand any protruding screws or imperfections.

C. Attaching the Legs

Position the legs at the four corners of the tabletop, ensuring they are evenly spaced and plumb. Use wood glue and screws to attach the legs to the apron (if used) or directly to the tabletop. If attaching directly to the tabletop, pre-drill pilot holes to prevent the wood from splitting. Ensure the legs are securely fastened and the tabletop is level and stable.

D. Finishing Touches

Once the construction is complete, inspect the coffee table for any imperfections. Fill any gaps or holes with wood filler and allow it to dry completely. Sand the filled areas smooth. Apply a wood stain or paint according to the manufacturer's instructions, allowing adequate drying time between coats. Finally, apply a clear coat of polyurethane for protection and durability. Allow ample time for the finish to dry completely before using the coffee table.

III. Safety Precautions

Safety should be a paramount concern throughout the construction process. Always follow these essential safety guidelines:

  • Wear safety glasses: Protect your eyes from flying debris.
  • Wear work gloves: Protect your hands from splinters and sharp edges.
  • Use appropriate tools: Ensure your tools are in good working condition and you are proficient in their use.
  • Work in a well-ventilated area: When using stains, paints, and polyurethane, ensure adequate ventilation to prevent inhalation of harmful fumes.
  • Follow manufacturer's instructions: Carefully read and follow all instructions provided with the materials and tools you are using.
  • Maintain a clean workspace: Keep your workspace organized and free of clutter to prevent accidents.

IV. Customization and Variations

The design presented provides a foundation for customization. You can adapt the dimensions, materials, and finish to match your personal preferences and existing décor. Consider incorporating these variations:

  • Different Wood Types: Experiment with various wood species to achieve different aesthetic effects.
  • Unique Leg Designs: Explore alternative leg designs, such as tapered legs or X-shaped supports.
  • Storage Features: Incorporate drawers or shelves for added functionality.
  • Metal Accents: Add metal accents, such as decorative brackets or hardware, to enhance the design.

By carefully following these steps and prioritizing safety, you can successfully build a durable and aesthetically pleasing DIY coffee table that will enhance your living space for years to come. Remember to enjoy the process and take pride in your handcrafted creation.

Best Woodworking Tables for Beginners – Buying & DIY Guide

Hey there, fellow woodworkers (or soon-to-be woodworkers)! So, you're diving into the amazing world of woodworking, and you're smart enough to realize that a solid workbench is your absolute best friend. But with so many options out there – from fancy, professional-grade beasts to simple DIY projects – it can feel a little overwhelming, right? Don't worry, I've got your back! This guide will walk you through everything you need to know about choosing (or building!) the perfect woodworking table for a beginner like yourself.

Buying a Ready-Made Woodworking Table: What to Look For

Let's face it, sometimes DIY isn't the most practical option, especially when you're just starting out. Buying a pre-made workbench can save you time and effort. But choosing the right one is crucial. Here's what to keep in mind:

Size Matters (Seriously!)

Don't underestimate the importance of size. You need enough space to comfortably work on your projects. A good rule of thumb is to aim for at least 4 feet wide and 6 feet long. Anything smaller might feel cramped, especially as your projects get bigger and more ambitious. Consider the size of the projects you plan to build. If you're mostly into small crafts, a smaller table will suffice. But if you envision building larger furniture pieces, you'll definitely need more room.

Material: Wood vs. Metal vs. Hybrid

This is a biggie. Solid wood workbenches are classic for a reason – they're sturdy, durable, and can be easily repaired. However, they can be expensive and heavy. Metal workbenches are incredibly robust and resistant to dents and scratches, perfect if you plan on using heavier tools. Hybrid designs combine the best of both worlds, often using a metal frame for stability and a wooden top for working comfort. Consider your budget and the type of woodworking you'll be doing.

Work Surface: The Unsung Hero

The top of your workbench is where the magic happens. Look for a smooth, flat, and durable surface. Consider the type of wood used – hardwoods like maple or beech are ideal for their durability. Check for any cracks or imperfections before purchasing. A thick tabletop is more resistant to dents and warping.

Features to Consider

Some workbenches come with handy extra features. These aren't essential for beginners, but they can be nice to have:

  • Vises: Essential for holding your work securely while you're sawing, planing, or gluing.
  • Drawers and shelves: Provide valuable storage for your tools and materials.
  • Built-in power strips: Convenient for powering your tools.
  • Mobile base: Allows you to easily move your workbench around the workshop.

Budgeting for Your New Workbench

Workbenches range wildly in price. You can find basic models for a few hundred dollars, but high-end professional ones can easily cost thousands. Set a realistic budget before you start shopping. Remember that this is an investment in your woodworking hobby – a good workbench will last you for years, if not decades!

Building Your Own Woodworking Table: A DIY Adventure

If you're feeling adventurous (and have some basic woodworking skills), building your own workbench can be a rewarding experience. It allows you to customize it perfectly to your needs and budget. However, it's a more time-consuming project.

Planning Your DIY Project

Before you even touch a saw, you need a plan. Sketch out your design, considering the size, materials, and features you want. Find detailed plans online – there are tons of free plans available on websites and forums dedicated to woodworking. Choose plans that are appropriate for your skill level.

Choosing the Right Materials

For a beginner's workbench, consider using readily available and relatively inexpensive lumber like pine or fir. Hardwoods are stronger and more durable, but they're also significantly more expensive. You'll also need screws, wood glue, clamps, and other basic woodworking tools.

Essential Tools for DIY

You'll need a basic set of woodworking tools. This includes:

  • Measuring tape and square
  • Saw (circular saw or hand saw)
  • Drill and drill bits
  • Screwdriver
  • Clamps
  • Safety glasses and hearing protection (Always prioritize safety!)

Step-by-Step Construction (A Simplified Overview)

The exact steps will depend on your chosen plan, but generally, building a simple workbench involves these stages:

  1. Cut the lumber to the required sizes.
  2. Assemble the legs and frame.
  3. Attach the tabletop.
  4. Add any additional features like vises or shelves (optional).
  5. Sand and finish the workbench.

Don't Forget the Finishing Touches

Once you've built the workbench, don't forget to sand it smooth and apply a finish. This will protect the wood from moisture and damage, and it will make your workbench look great! Consider a varnish, polyurethane, or even a simple oil finish.

Choosing Between Buying vs. DIY

Ultimately, the best option depends on your skills, budget, and time constraints. If you're short on time or lack woodworking experience, buying a pre-made workbench is likely the better choice. However, building your own workbench can be a very satisfying experience, and it allows for complete customization. Weigh the pros and cons carefully before making your decision.

Frequently Asked Questions (FAQs)

Here are some frequently asked questions about woodworking tables for beginners:

What's the difference between a workbench and a worktable?

While often used interchangeably, a workbench typically implies a sturdier construction, often with a vise and designed for heavier-duty tasks. A worktable is usually lighter and more portable, better suited for lighter tasks.

How much should I spend on a woodworking table?

The price range is vast. Expect to spend anywhere from a few hundred dollars for a basic model to several thousand for a high-end professional workbench. Your budget should reflect your needs and skill level.

Do I need a vise for my workbench?

A vise is highly recommended, especially as you progress in your woodworking. It provides secure clamping for your workpieces, making many tasks safer and easier.

What type of wood is best for a workbench top?

Hardwoods like maple, beech, or oak are ideal for their durability and resistance to wear and tear. However, softer woods like pine are more affordable and still suitable for beginners.

Can I build a workbench without any prior woodworking experience?

Yes, but you'll need to choose a simple design and follow detailed instructions carefully. Starting with a smaller, simpler project is a great way to gain experience before tackling more complex builds.

Happy woodworking! Remember to always prioritize safety and have fun with the process. Let me know in the comments if you have any other questions!

Woodworking Table Design Ideas – Functional & Stylish

The woodworking table serves as the cornerstone of any workshop, a crucial element dictating both the efficiency and enjoyment of the crafting process. A well-designed woodworking table is more than just a flat surface; it's a carefully considered system integrating functionality, durability, and aesthetic appeal. This article explores a range of design ideas, catering to diverse needs and styles, enabling the discerning woodworker to create or select a table perfectly suited to their craft.

I. Essential Considerations for Design

Before diving into specific designs, it's imperative to consider several fundamental aspects influencing the table's efficacy and longevity. These elements underpin the success of any woodworking table project.

A. Size and Dimensions

The dimensions of the woodworking table should be carefully determined based on the type of projects undertaken and the available workspace. A larger table provides ample space for larger projects and allows for multiple tools and materials to be readily accessible. Conversely, a smaller table may suffice for smaller-scale projects and limited space. Consider the maximum size of the workpiece you anticipate handling and ensure the table's surface area comfortably accommodates it with sufficient surrounding space for tooling and maneuverability. Standard table heights typically range from 34 to 36 inches, but personal preference and ergonomic considerations should guide this decision.

B. Material Selection

The choice of materials significantly impacts both the table's performance and aesthetic appeal. Hardwoods like maple, oak, and cherry are excellent choices due to their durability, resistance to wear, and attractive grain patterns. However, their cost can be a significant factor. Softwoods such as pine or fir offer a more budget-friendly option, but may require more maintenance and be less resistant to damage. MDF (Medium-Density Fiberboard) and plywood provide cost-effective alternatives, often used as core materials with hardwood tops for a blend of affordability and durability. Careful consideration should also be given to the finish, with polyurethane finishes providing excellent protection against moisture and wear.

C. Structural Integrity and Stability

A robust and stable table is paramount for accurate and safe woodworking. A strong frame, typically constructed from 2x4s or thicker lumber, forms the foundation. The legs should be securely fastened to the frame, utilizing joinery techniques such as mortise and tenon, dowel joints, or robust screw fastenings. Bracing, either internal or external, enhances stability, preventing wobble and ensuring the table remains steadfast even under heavy loads. Consider the weight of the tools and materials you will be using, ensuring the structure can support these without flexing or instability.

II. Functional Design Elements

Beyond the fundamental structural elements, incorporating specific functional features elevates the woodworking table from a simple surface to a highly efficient workspace.

A. Built-in Vise

A robustly integrated vise is a highly desirable feature, providing secure clamping for various woodworking tasks. Consider the type of vise best suited to your needs; a front vise is commonly used, offering excellent accessibility. A tail vise, often located at the rear, is ideal for clamping long workpieces. Alternatively, a combination of both provides maximum versatility. Ensure the vise is securely mounted to the table's frame to withstand significant clamping force.

B. Dog Holes and Clamps

Strategically positioned dog holes, typically spaced evenly across the table's surface, facilitate the use of bench dogs and various clamping systems. These provide a versatile system for holding and securing workpieces during various operations. Consider the size and spacing of the dog holes to accommodate a range of clamps and workpiece sizes. The incorporation of a comprehensive clamping system significantly enhances the table's versatility.

C. Outfeed Support

For operations such as planing and cutting, an outfeed support is crucial for safety and accuracy. This extension to the table provides a stable surface for the workpiece to rest on as it exits the tool, preventing it from tipping or dropping. The outfeed support should be adjustable in height and length to accommodate different tools and workpiece sizes.

D. Storage Solutions

Integrating storage solutions directly into the woodworking table design enhances organization and workflow efficiency. Drawers, shelves, or cabinets can be incorporated into the table's frame, providing dedicated space for tools, materials, and other accessories. Consider the types and sizes of tools and materials you frequently use, designing storage solutions to optimize accessibility and prevent clutter.

III. Stylish Design Considerations

While functionality is paramount, the aesthetic appeal of the woodworking table shouldn't be overlooked. A well-designed table can be both functional and a visually pleasing addition to the workshop.

A. Wood Species and Finish

The choice of wood species significantly influences the table's visual appeal. The natural grain patterns and colors of hardwoods such as cherry, walnut, or maple can create a stunning visual effect. The finish further enhances the aesthetic qualities; a clear coat highlights the wood's natural beauty, while a stained finish can create a specific color palette to complement the workshop's overall design.

B. Design Details and Accents

Incorporating subtle design details can elevate the table's aesthetic appeal. These could include:

  • Chamfered edges: Softening the sharp edges of the table provides a refined look and feel.
  • Rounded corners: Improving safety while enhancing the overall visual appeal.
  • Inlays: Adding contrasting wood species or materials for a decorative touch.
  • Metal accents: Incorporating metal hardware such as handles, hinges, or brackets can create a sophisticated contrast.

C. Integration with the Workshop

The woodworking table's design should ideally complement the overall style and design of the workshop. Consider the color palette, materials, and overall aesthetic of the space when selecting wood species, finishes, and design details. A cohesive design creates a harmonious and visually appealing workspace.

IV. Examples of Woodworking Table Designs

Numerous woodworking table designs cater to diverse needs and preferences. These examples highlight the versatility of design possibilities:

  • The Classic Workbench: A simple yet robust design emphasizing functionality, typically featuring a sturdy frame, a large work surface, and often a built-in vise.
  • The Mobile Workbench: Incorporating wheels allows for easy relocation of the table, offering flexibility for different projects and workspace configurations.
  • The Island Workbench: A larger, freestanding table that serves as a central hub in the workshop, providing ample workspace and potentially incorporating storage solutions.
  • The Multi-Purpose Workbench: A design that integrates features beyond basic woodworking, such as metalworking capabilities or an integrated power supply.

Ultimately, the ideal woodworking table design is a synthesis of functionality, durability, and aesthetic appeal, tailored specifically to the individual woodworker's needs and preferences. By careful consideration of the design elements outlined above, the discerning woodworker can create or select a table that will serve as a reliable and inspiring centerpiece of their workshop for years to come.

Live Edge Coffee Table DIY – Free Step-by-Step Guide

Hey there, fellow DIY enthusiasts! So you're dreaming of a stunning, rustic live edge coffee table, but the price tags at the furniture stores are giving you sticker shock? Don't worry, you're in the right place! This guide will walk you through building your own gorgeous live edge coffee table, saving you a ton of money and giving you a piece you'll truly be proud of. Let's get started!

Gathering Your Supplies: The Foundation of Your Project

Before we even think about sawing wood (which, let's be honest, is the fun part!), we need to gather all our supplies. This is crucial for a smooth build, trust me! Running to the hardware store mid-project is *never* fun.

Essential Materials:

  • Live edge slab: This is the star of the show! The thickness depends on your preference, but 1.5" - 2" is a good starting point. Source your slab from a local lumberyard, sawmill, or even online. Make sure it's properly dried – this prevents warping later on.
  • Legs: This is where your personal style comes into play! You can choose hairpin legs (super trendy and easy to attach), tapered legs for a more traditional look, or even build your own from wood. I'll be focusing on hairpin legs in this guide for their ease of use.
  • Wood screws (appropriate size for your legs and slab): Always have extra on hand – just in case!
  • Wood glue (exterior grade): Important for a strong bond between the slab and the legs.
  • Wood filler: To fill any gaps or imperfections in the wood.
  • Sandpaper (various grits): Start with a coarser grit to remove any major imperfections, and then gradually move to finer grits for a smooth finish.
  • Wood stain (optional): If you want to enhance the natural beauty of the wood or add some color.
  • Polyurethane (optional): To protect your beautiful table from spills and everyday wear and tear.
  • Measuring tape, pencil, level, drill with drill bits (matching your screws), safety glasses, and hearing protection: Safety first, always!

Preparing the Live Edge Slab: Beauty Starts with Preparation

Now for the fun part (almost!). Your live edge slab likely needs some pre-treatment before we get to the construction stage.

Cleaning and Inspecting:

Give your slab a good cleaning. Use a brush to remove any loose debris, dirt, or bark. Inspect the slab for any cracks or imperfections. We'll address those later.

Sanding the Slab:

This is where the elbow grease comes in. Start with a coarser grit sandpaper (around 80 grit) to remove any rough spots, splinters, or major imperfections. Gradually work your way up to finer grits (120, 180, and then 220) for a smoother, more polished surface. Remember to sand with the grain of the wood to avoid scratches.

Filling Imperfections:

Once you're happy with the sanding, use wood filler to fill any cracks or gaps in the wood. Let it dry completely according to the manufacturer's instructions and then sand it smooth.

Attaching the Legs: The Structural Heart of Your Table

With the slab prepped, it's time to attach the legs. This is straightforward, especially with hairpin legs.

Marking Leg Placement:

Measure the desired placement of your legs. For stability, aim for a placement that evenly distributes the weight. Use a pencil to mark the locations on the underside of the slab.

Pre-Drilling Pilot Holes:

This is crucial to prevent the wood from splitting. Pre-drill pilot holes at each marked leg location. Use a drill bit slightly smaller than your screws.

Attaching the Legs:

Apply wood glue to the underside of the slab at the marked locations. Then, align the legs with the marked spots and firmly screw them in place using the appropriate drill bit and screws. Make sure the legs are level and evenly spaced.

Finishing Touches: Bringing Out the Beauty

Almost there! Now, let's add those final touches to make your live edge coffee table truly shine.

Stain (Optional):

If you've chosen to stain your table, now is the time! Apply the stain according to the manufacturer's instructions. Let it dry completely before moving to the next step.

Sealing (Optional):

Sealing your table protects it from spills and general wear and tear. Apply several coats of polyurethane, sanding lightly between coats for a smooth finish. Let it dry thoroughly.

Admiring Your Masterpiece!

Congratulations! You've successfully built your own stunning live edge coffee table. Sit back, relax, and admire your handiwork. You deserve it!

Frequently Asked Questions

Q: Where can I find a live edge slab? A: Local lumberyards, sawmills, and online retailers are great places to find live edge slabs. Check your local Craigslist or Facebook Marketplace too! Q: What type of wood is best for a live edge coffee table? A: Many hardwoods work well, such as walnut, maple, cherry, or oak. The choice depends on your preference and budget. Q: How do I prevent my live edge coffee table from warping? A: Ensure your slab is properly dried before starting your project. Using an exterior-grade wood glue and allowing the finish to cure properly also helps prevent warping. Q: Can I use different types of legs? A: Absolutely! Hairpin legs are easy, but you can get creative with traditional wooden legs, metal legs, or even build your own custom legs. Q: How long does this project take? A: The total time depends on your experience and how much time you can dedicate each day. Expect to spend several hours, spread over a few days or even a weekend, allowing for drying time between steps. Q: What if my slab has significant cracks? A: Use wood filler to repair smaller cracks. For larger cracks, consult with a woodworking professional for advice on reinforcement techniques. I hope this guide has helped you on your journey to building your dream live edge coffee table! Remember, take your time, enjoy the process, and don't be afraid to experiment. Happy crafting!

Pallet Wood Table Plans – A Comprehensive DIY Guide

This comprehensive guide provides detailed instructions for constructing a sturdy and aesthetically pleasing table from reclaimed pallet wood. The project, while achievable for intermediate DIY enthusiasts, demands meticulous attention to detail and a commitment to safety throughout the process. Improper handling of tools or inadequate preparation of materials can lead to suboptimal results or even injury. Therefore, careful adherence to the outlined steps is paramount.

I. Material Selection and Preparation

The foundation of any successful DIY project lies in the quality of its materials. Reclaimed pallet wood, while readily available and cost-effective, requires careful scrutiny before utilization. Not all pallets are created equal; some may be treated with chemicals detrimental to health or contain embedded nails or staples that pose significant safety risks.

A. Sourcing Pallet Wood

Source your pallets responsibly. Avoid pallets displaying the IPPC stamp (International Plant Protection Convention) unless you are certain they are heat-treated and free from harmful chemicals. Many businesses discard pallets; however, always obtain permission before retrieving them. Inspect each pallet thoroughly for signs of rot, damage, or embedded metal. Prioritize pallets constructed from consistent, sturdy wood, ideally softwoods like pine or fir, for easier working.

B. Deconstructing the Pallets

Safety First: Wear appropriate safety glasses and work gloves throughout the deconstruction process. Use a pry bar or hammer and nail puller to carefully remove the nails or staples securing the boards. Be mindful of splinters and potential injuries. Once the boards are removed, inspect them closely for damage. Discard any significantly warped, cracked, or compromised pieces. Set aside the usable boards for cleaning and preparation.

C. Cleaning and Sanding

Pallet wood is often exposed to the elements and may contain dirt, debris, or remnants of previous treatments. Thorough cleaning is essential. Use a wire brush to remove loose dirt and debris. A pressure washer can effectively clean larger quantities of wood, however, be cautious to avoid excessive water pressure, which could damage the wood. After cleaning, allow the wood to dry completely. Once dry, sand each board thoroughly, starting with coarser grit sandpaper (e.g., 80-grit) to remove rough patches and splinters, and gradually progressing to finer grits (e.g., 120-grit and then 220-grit) for a smoother finish. Ensure all surfaces are smooth to the touch before proceeding.

II. Table Design and Measurement

Before commencing construction, create a detailed plan outlining the table's dimensions, desired style, and structural elements. This will ensure a cohesive and functional end product.

A. Choosing Table Dimensions

Consider the intended use and available space when determining the table's dimensions. Typical dining tables range from 60 inches to 72 inches in length and 30 inches to 36 inches in width. The height is generally around 30 inches. However, your design may deviate depending on your preferences and requirements. Create accurate measurements and transfer them to your chosen wood.

B. Selecting a Tabletop Design

The tabletop can be constructed using a single large piece of reclaimed pallet wood, or multiple smaller pieces arranged to create a unique aesthetic. Ensure the chosen design offers sufficient stability and strength. Consider using wood glue and screws or dowels for joining multiple pieces. For a rustic look, visible joinery can enhance the design's character. For a cleaner look, consider planing the boards down for a smoother, more uniform finish and then use biscuits or pocket hole joinery for strength and a clean join.

C. Leg and Support Structure Design

The table legs and supporting structure are crucial for stability and longevity. Consider using 4 sturdy legs, or alternatively, explore A-frame or trestle designs for a more visually striking table. Ensure that the chosen design provides adequate support for the tabletop and can withstand expected weight and stress. Accurate measurements and cuts are vital to ensure a structurally sound frame.

III. Construction Process

This phase involves assembling the various components of the table according to the pre-planned design.

A. Constructing the Tabletop

If using multiple pieces of wood, meticulously align and clamp them securely. Apply wood glue liberally to the joints and fasten with screws or dowels, ensuring the screws are countersunk and the dowels are flush with the surface. Once the glue has dried, sand the tabletop smooth, paying particular attention to the joints. Apply a wood filler to any gaps or imperfections before sanding again.

B. Assembling the Table Legs and Support Structure

Precisely cut and assemble the chosen leg and support structure according to your plan. Use wood glue and screws or bolts to secure the joints. Ensure the structure is square and plumb throughout the assembly process. Pre-drill pilot holes to prevent the wood from splitting. Check for stability by gently rocking the frame to ensure it stands securely.

C. Attaching the Tabletop to the Base

Once the base is securely assembled and stable, attach the tabletop. Use strong screws or bolts to create a secure connection between the tabletop and the base. Ensure that the connection is even and that the tabletop is level. Countersink all screws and fill the holes with wood filler before sanding. If using a heavy tabletop, additional support brackets might be necessary.

IV. Finishing Touches

The final stages involve enhancing the table's appearance and protecting the wood from wear and tear.

A. Sanding and Smoothing

After assembly, lightly sand the entire table to remove any remaining imperfections or rough edges. Start with finer grit sandpaper and gradually move to a very fine grit for a polished finish. Carefully sand all edges and corners to prevent splintering.

B. Applying a Protective Finish

Apply a protective finish to safeguard the wood from moisture, scratches, and other damage. Options include varnish, polyurethane, or stain. Follow the manufacturer's instructions for application and drying times. Multiple thin coats are preferable to one thick coat to avoid unevenness and drips. Allow adequate drying time between coats.

V. Conclusion

Constructing a pallet wood table is a rewarding DIY project that allows for creativity and customization. By carefully following these steps and prioritizing safety, you can create a durable and aesthetically pleasing piece of furniture that will last for years to come. Remember to always exercise caution when handling tools and materials, and enjoy the process of transforming reclaimed wood into a functional and beautiful addition to your home. The final product stands as a testament to careful planning, meticulous execution, and the satisfaction of creating something unique with your own hands.

DIY Pallet Woodworking Projects – Free Plans & Ideas

Reclaimed pallet wood offers a fantastically affordable and sustainable material for a plethora of DIY woodworking projects. Its rustic charm lends itself beautifully to both functional and decorative pieces, adding a unique character to any home or garden. This article explores the exciting possibilities of pallet wood, providing you with free plans and ideas to ignite your creativity and transform discarded pallets into stunning handcrafted items. Get ready to unleash your inner craftsman and discover the immense potential hidden within these often-overlooked materials!

Beginner-Friendly Pallet Projects

If you're new to woodworking, pallet projects are a perfect starting point. Their inherent imperfections add to their rustic appeal, minimizing the pressure for flawless execution. Start with simpler projects to build your confidence and skills before tackling more complex designs. The forgiving nature of pallet wood allows for experimentation, making it ideal for learning fundamental woodworking techniques without the fear of ruining expensive lumber.

Simple Pallet Shelves

Build easy-to-assemble shelves using reclaimed pallet wood. Disassemble a pallet carefully, selecting boards in good condition. Sand the wood thoroughly to remove splinters and create a smooth surface. Measure and cut the boards to your desired dimensions. You can construct simple shelves using basic brackets or create more elaborate designs incorporating decorative elements like rustic metal brackets or rope. Finish with a coat of stain or paint to protect the wood and enhance its aesthetic appeal. A tutorial with detailed instructions can easily be found online, guiding you through each step.

Rustic Pallet Coasters

Upcycle small pieces of pallet wood into unique and charming coasters. Cut the wood into square or circular shapes, ensuring the edges are smooth. Sand them down meticulously, then apply a sealant to protect them from spills. Consider adding a decorative touch with stencils, paint, or decoupage techniques. These charming coasters are perfect for adding a personal touch to your coffee table or dining area. They're a great way to use up smaller pieces of pallet wood that might otherwise go to waste.

Intermediate Pallet Wood Projects

Once you've mastered some basic techniques, you can progress to more challenging and rewarding projects. These intermediate projects require more precision and attention to detail, but the results will be significantly more impressive and satisfying.

Pallet Coffee Table

Construct a sturdy and stylish coffee table using multiple pallets. This project requires more planning and careful assembly, but the end result is a unique piece of furniture that will be the focal point of your living room. You'll need to disassemble the pallets, select the strongest boards, and then plan the table's structure, considering the size and arrangement of the boards. You'll likely need to use wood glue, screws, and possibly additional bracing for extra support. A thorough sanding and a protective finish will complete the project, leaving you with a beautiful, handcrafted coffee table.

Pallet Headboard

Create a striking headboard to add a touch of rustic charm to your bedroom. This project demands careful planning and measurement to ensure the headboard fits your bed perfectly. Choose pallets in good condition with aesthetically pleasing boards. You might need to fill gaps or replace damaged boards to maintain a consistent look. After assembling the headboard, sand thoroughly and apply a stain or paint of your choice. This project will transform your bedroom with a unique and personalized piece of furniture.

Advanced Pallet Woodworking Projects

For experienced DIYers, more ambitious projects are within reach. These require advanced woodworking skills and more intricate design considerations, but the rewards are well worth the effort.

Pallet Garden Furniture

Build a complete outdoor seating area, including benches, chairs, and a table, using reclaimed pallet wood. This project involves advanced joinery techniques, careful planning, and attention to detail to ensure the furniture's durability and weather resistance. You'll likely need to incorporate weather-resistant finishes and potentially additional structural supports to withstand outdoor conditions. The result will be a beautiful and functional outdoor space that showcases your woodworking talent.

Pallet Vertical Garden

Create a stunning vertical garden by repurposing pallets into planters. This requires careful planning of the layout and drainage system. You'll need to ensure adequate spacing for the plants and consider the weight capacity of the pallets when attaching them to the wall. This environmentally friendly project will transform a dull wall into a vibrant, living feature.

Remember to always prioritize safety when working with wood and power tools. Wear appropriate safety gear, such as safety glasses and gloves. Enjoy the creative process and the satisfaction of transforming discarded materials into beautiful and functional pieces.

Best DIY Coffee Tables for Beginners – Easy & Affordable Plans

Tired of boring, mass-produced furniture? Craving a unique piece that reflects your style without breaking the bank? Then dive into the rewarding world of DIY coffee tables! These projects are perfect for beginners, requiring minimal tools and experience. You'll be amazed at the transformation you can achieve with a little creativity and effort. Get ready to build something beautiful and functional, tailored precisely to your living space. Let's explore some fantastic and accessible options.

The Pallet Paradise Coffee Table

Repurposing materials is not only environmentally friendly but incredibly budget-friendly too! This project utilizes readily available shipping pallets, offering a rustic charm that's hugely popular. Start by carefully dismantling a pallet, ensuring you remove any loose nails or splinters. Sand down the wood to achieve a smooth surface, paying extra attention to any rough edges. You then have a few options: you can leave the rustic look as is, stain it for a richer tone, or paint it a vibrant color to match your décor. Once the finish is dry, simply arrange the reclaimed pallet wood pieces to form your table's desired shape and size. Secure them together with wood glue and screws, adding sturdy legs made from scrap wood or even purchased metal legs for a modern touch. Finish with a coat of sealant to protect your beautiful creation.

Tools You'll Need:

  • Hammer
  • Screwdriver
  • Sandpaper
  • Wood glue
  • Screws
  • Wood stain or paint (optional)
  • Sealant

The Upcycled Barrel Coffee Table

Give an old wine barrel a new lease on life by transforming it into a stunning coffee table! This project is surprisingly easy and yields a strikingly unique piece. Source a used wine barrel—look for them at wineries, breweries, or even online marketplaces. Clean the barrel thoroughly, removing any residual wine or debris. You'll likely need to sand the wood to create a smooth finish. Once cleaned, you can choose to leave the wood's natural look, apply a stain, or paint it a bold color. Consider adding casters for easy mobility. A simple glass top can then be placed on top, creating a striking contrast between the rustic barrel and the sleek glass. This project showcases your resourcefulness and adds a touch of vintage charm to your living room.

Tools You'll Need:

  • Cleaning supplies
  • Sandpaper
  • Wood stain or paint (optional)
  • Glass top (optional)
  • Casters (optional)

The Simple Crate Coffee Table

For a minimalist and incredibly easy project, opt for a simple crate coffee table. Source sturdy wooden crates—you might find them at flea markets, farm supply stores, or even online retailers. Depending on the crate's condition, you might need to sand it down and apply a fresh coat of paint or stain. Once it's prepped, consider adding a simple wood top for extra stability and surface area. This can easily be created by using a piece of plywood cut to size. Attach the top securely using screws and wood glue. To add a touch of personality, consider adding decorative knobs or handles to the sides of the crate. This project's simplicity allows you to focus on choosing the perfect crate and finish to complement your existing furniture.

Tools You'll Need:

  • Sandpaper
  • Wood stain or paint (optional)
  • Plywood (for the tabletop)
  • Screws
  • Wood glue

With these easy-to-follow plans, building your own unique and affordable coffee table is within your reach. So, gather your supplies, embrace your creativity, and enjoy the satisfaction of crafting a beautiful piece for your home!

Build Your Dream Workshop: A DIY Modular Woodworking Table

Hey there, fellow woodworkers! Are you tired of cramped workspaces and makeshift tables that wobble more than a newborn giraffe? Do you dream of a workshop that's as adaptable and functional as you are? Then you've come to the right place! This guide will walk you through building your very own DIY modular woodworking table â€" a customizable, expandable powerhouse that will transform your workshop.

Forget those overpriced, one-size-fits-all workbench kits. This project is all about empowerment. We'll design a table that grows with your needs, adapts to different projects, and ultimately reflects your unique style. Get ready to roll up your sleeves, because we're diving into a rewarding build!

Planning Your Modular Masterpiece

Before we even think about sawing wood, we need a solid plan. This isn’t just about throwing some boards together; we’re crafting a precision instrument. So grab your favorite beverage, a notepad, and let’s brainstorm:

Defining Your Needs

First things first: what kind of woodworking do you do? Are you a master craftsman tackling intricate joinery, or a weekend warrior building birdhouses? Your answer will dictate the size, features, and overall design of your table.

Consider these questions:

  • What’s the maximum size project you anticipate working on?
  • What tools will you be using regularly on this table (planers, jointers, etc.)?
  • Do you need built-in vises, clamping systems, or other specialized features?
  • How much space do you have available in your workshop?
  • What’s your budget? (Remember, modularity means you can build it in stages!)

Choosing Your Materials

Now for the fun part â€" picking your materials! The heart of your table will be the frame, and you'll want something sturdy. Hardwoods like maple, oak, or beech are excellent choices for their durability and resistance to wear and tear. For the tabletop, you could use a solid hardwood slab (gorgeous but pricey!), or go with a more budget-friendly option like plywood, MDF, or even melamine-coated particleboard (if you're careful about edge banding!).

Don't forget about your fasteners! High-quality screws, bolts, and possibly even dowels or joinery techniques will hold everything together. Consider using stainless steel or galvanized hardware for longevity.

Sketching Out Your Design

I know, I know, you're probably not an architect. But even a rough sketch will help you visualize the final product and make sure everything fits together. Consider these key elements:

  • Modular Frame: Think of individual sections that can be easily connected and rearranged. A classic approach is to use a grid system of 2ft x 2ft (or metric equivalent) modules.
  • Leg System: Robust legs are crucial. Consider using 4x4 posts or even metal legs for extra stability. Make them adjustable for uneven floors.
  • Tabletop Supports: Strong cross-members will provide support for your tabletop and prevent sagging.
  • Storage: If space is tight, think about integrating drawers, shelves, or tool hanging systems.

Building Your Modular Wonder

With your plan finalized, it's time to get building! This is where your woodworking skills will shine. Remember to take your time, double-check your measurements, and enjoy the process!

Constructing the Modular Frames

Begin by cutting your hardwood to the dimensions you planned for your modular frame sections. Accurate cuts are crucial here. Utilize your table saw or miter saw for precision. Assemble each frame using strong joinery such as mortise and tenon, pocket holes, or even robust butt joints reinforced with screws and wood glue.

Creating the Leg System

Your legs need to be rock-solid! Attach them to the frame sections using strong screws and possibly reinforcing plates. If you're using adjustable feet, install them now. Ensure the legs are perfectly square and plumb â€" a level is your best friend here.

Attaching the Tabletop

Once the frame is assembled, carefully attach the tabletop. You could use clamps to temporarily secure it while you predrill pilot holes and fasten it securely. Consider adding a few extra supports underneath for very large or heavy tabletops.

Adding Customizable Features

Now for the fun part: personalization! This is where your modular design truly shines. Add those features you brainstormed earlier. This could include:

  • Built-in Vises: Securely mount vises to your frame using robust bolts.
  • Clamping Systems: Incorporate dog holes or a track system for easy clamping.
  • Tool Storage: Build drawers, shelves, or add a pegboard system for convenient tool organization.
  • Power Strips: Integrate power outlets for your power tools (be mindful of safety regulations!).

Finishing Touches and Customization

After you've built your basic table, the real fun begins. You can customize and personalize your workbench to fit your specific needs and style. Consider these options:

  • Finishing: Apply a protective finish like varnish, polyurethane, or oil to protect your table from spills and wear and tear.
  • Customizable Top: If you used plywood or MDF for the tabletop, you can add a protective layer of epoxy resin to make it more durable or even create a beautiful river table effect.
  • Add-ons: Your modular design makes it simple to add new sections later. You can always expand your table as your woodworking projects grow more complex.

Commonly Asked Questions

Q: What kind of wood should I use? A: Hardwoods like maple, oak, or beech are ideal for the frame. For the tabletop, you have options â€" solid hardwood, plywood, MDF, or melamine-coated particleboard. It depends on your budget and aesthetic preferences.

Q: How do I make it modular? A: The key is to design the frame in sections (e.g., 2ft x 2ft modules) that can be connected with strong fasteners. This allows you to easily rearrange, expand, or even reconfigure the table as needed.

Q: How much will this cost? A: That depends on the materials and features you choose. A basic table can be built relatively affordably, while adding advanced features like built-in vises or custom tool storage will naturally increase the cost.

Q: What tools will I need? A: You'll need standard woodworking tools including a saw (circular saw, miter saw, or table saw), drill, screwdriver, clamps, measuring tape, level, and potentially a router depending on your design and joinery choices.

Q: Can I build this even if I'm a beginner? A: Yes! While some woodworking experience is helpful, this project is designed to be achievable for intermediate woodworkers. Take your time, follow the instructions carefully, and don't be afraid to ask for help if you need it.

There you have it! Your journey to building a fantastic DIY modular woodworking table is just beginning. Remember, this is your project, your space, and your design. Make it your own! Happy building!